Insulation Calculator

Estimate insulation purchase quantities from measured area, opening deductions where applicable, an editable allowance, and the coverage printed for the exact product. Treat the page's R-value and depth values as planning math, then confirm the assembly and local requirements for the building.

Example Projects

Attic Batts

40 × 20 ft • R-49

Wall Batts

40 lf × 8 ft • R-15

Blown-In Attic

40 × 30 ft • Cellulose R-38

Crawl Space Floor

30 × 24 ft • R-25

Configure Insulation View Results

Recommended for this application: R-13 to R-21.

Insulation & R-Value

Insulation Estimate

Bundles to Order
0
Batts, rolls, bags, or board feet to buy (with waste).
Net Insulation Area
0 ft²
Area to insulate after any deductions.
Target R-Value
Recommended thermal resistance.
Required Depth
Thickness needed to reach the target R-value.
View Calculation Breakdown
Gross area0 ft²
Net insulation area0 ft²
Net area with waste0 ft²

How this was calculated:

Enter dimensions to see the calculation…
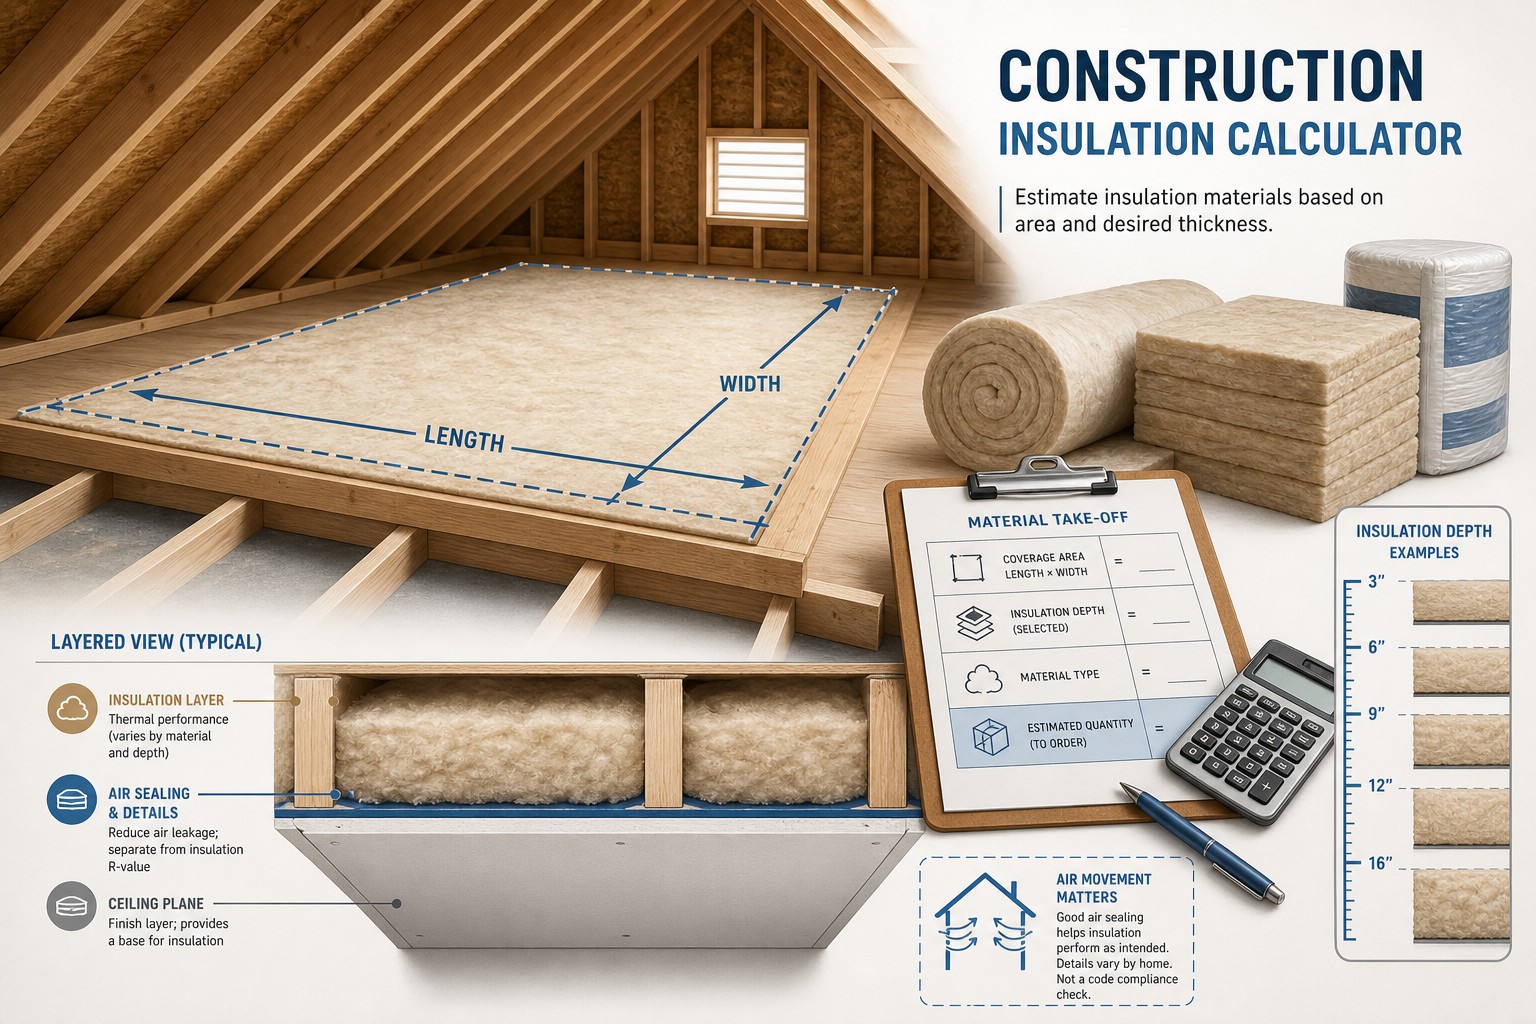
Editorial illustration of an attic insulation takeoff showing measured floor area, an attic hatch, joist bays, insulation packages, a tape measure, and a coverage worksheet.
A reliable insulation order begins by defining the insulated boundary and using the coverage chart for the exact material, R-value, and installation method.
Transparent calculator

Check the method before you use the estimate

This page documents the formula, assumptions, and any specific external sources used for this tool.

See the method
Planning estimate What this result can and cannot tell you

Planning estimate only. Confirm the actual insulated boundary, existing conditions, target assembly, local energy and safety requirements, exact product label coverage, thickness or settled depth, air-sealing and moisture details, fire or clearance requirements, and safe installation method with the responsible project parties before purchasing or installing insulation.

Read the full site disclaimer.

Found an error or unclear result? Tell us what happened so it can be investigated.
Calculator feedback

Report an issue with Insulation Calculator

Your report is saved for the Octa Calculator team to review. Do not include sensitive financial, medical, or personal information.

This site is protected by reCAPTCHA and the Google Privacy Policy and Terms of Service apply.

Method & sources

How the Insulation Calculator works

These notes describe the calculation used on this page and the assumptions that can change a real-world result.

Measured insulation area, exact product coverage, and planning R-value depth net area = max(gross area − measured openings, 0); order units = ceil(net area × (1 + allowance) ÷ entered coverage per unit); displayed depth = target R-value ÷ calculator material-mode R per inch

Assumptions on this page

  • Area modes calculate length × width, while wall mode calculates length × height and subtracts the entered window and door opening areas. Only real, measured openings that remove the selected insulation area should be deducted.
  • For batts and bags, the tool rounds up net area plus the allowance divided by the coverage value entered. That value must be checked against the exact product's label, thickness or target R-value, and installation method.
  • For spray foam, the tool calculates board feet as net area plus allowance multiplied by the entered depth in inches. One board foot is one square foot at one inch thick; this is quantity arithmetic, not a spray-foam specification.
  • The page's material-mode R-per-inch values and prefilled target R-values are planning defaults only. They are not a code lookup, a climate-zone determination, a product label, or a full wall, ceiling, roof, or floor assembly calculation.
  • For loose-fill bag mode, changing the depth field does not automatically change the bag count. Enter the exact product-label coverage for the selected target R-value or settled depth before relying on the output.

Sources used on this page

Guide & Reference

Everything behind the Insulation Calculator

Formulas, reference charts, and detailed answers — expand any section you need.

Turn the calculation into a transparent material order

Keep each quantity and decision in its own line. This prevents a correct area calculation from being paired with the wrong product, thickness, or installation method.

Order checkWhat the calculator organizesWhat still needs confirmation
Insulated boundaryGross rectangular area and entered openings in wall modeWhich building surface is being insulated, real dimensions, transitions, and areas with different assemblies.
AllowanceEntered percentage added to net areaWhy it is needed for cuts, product packaging, interruptions, or field conditions.
Batts, rolls, or bagsNet area with allowance divided by entered coverageExact product label, R-value, thickness or settled depth, facing, package coverage, and current instructions.
Spray foamBoard feet from area with allowance and entered depthSpecified product, density, assembly, application conditions, substrate, clearance, ventilation, and installer requirements.
Cost fieldsMultiplication of prices you enterCurrent supplier quote, delivery, installation, preparation, access, and any project-specific work.

If an exterior wall finish is part of the scope, the Siding Calculator can organize a separate material quantity. It does not validate wall assembly, flashing, air barrier, or insulation details.

Worked calculator example: the Attic preset

Select the calculator's Attic preset. It enters a 40 ft by 20 ft attic area, one section, fiberglass-batt mode, 40 sq ft coverage per bundle, a target R-value of 49, and a 10% allowance. These are calculator inputs, not a recommendation for every attic.

  1. Gross area = 40 × 20 = 800 sq ft.
  2. Attic mode has no opening deductions in the tool, so net area = 800 sq ft.
  3. Area with the entered allowance = 800 × 1.10 = 880 sq ft.
  4. Bundles to order = ceil(880 ÷ 40) = 22 bundles.
  5. Displayed planning depth = 49 ÷ 3.2 = 15.3 in.

Those values match the current calculator output. They do not prove that a 40 sq ft bundle, an R-49 target, or a 15.3 in depth is the correct material and assembly for a specific attic. Verify the exact package label, existing insulation, framing depth, air sealing, local requirements, and product instructions before buying material.
What this Insulation Calculator can—and cannot—tell you

This tool turns a measured insulation boundary into a preliminary purchase quantity. It calculates gross area, subtracts the window and door areas entered in wall mode, adds the allowance you choose, and divides by the coverage per unit you enter. That is useful material arithmetic when the boundary and exact product label are known.

It does not select a complete insulation assembly. R-value, insulation type, thickness, air sealing, moisture control, clearances, fire safety, ventilation, framing, existing conditions, and local requirements all interact. The calculator's prefilled target R-values and R-per-inch values are planning defaults, not a local code lookup or professional assessment.

For a broader worksheet covering product labels, loose-fill charts, and boundary checks, read How to Estimate Insulation Batts, Rolls, and Blown-In. This page stays focused on the calculator's exact arithmetic and the input checks that make it useful.

Measure the insulated boundary before counting packages

First decide what physical layer you are measuring. An attic-floor area, a wall cavity area, a floor over an unconditioned space, and the underside of a roof deck are different boundaries. The calculator has simple area and wall modes, but it cannot determine which boundary belongs to the building's intended thermal and moisture design.

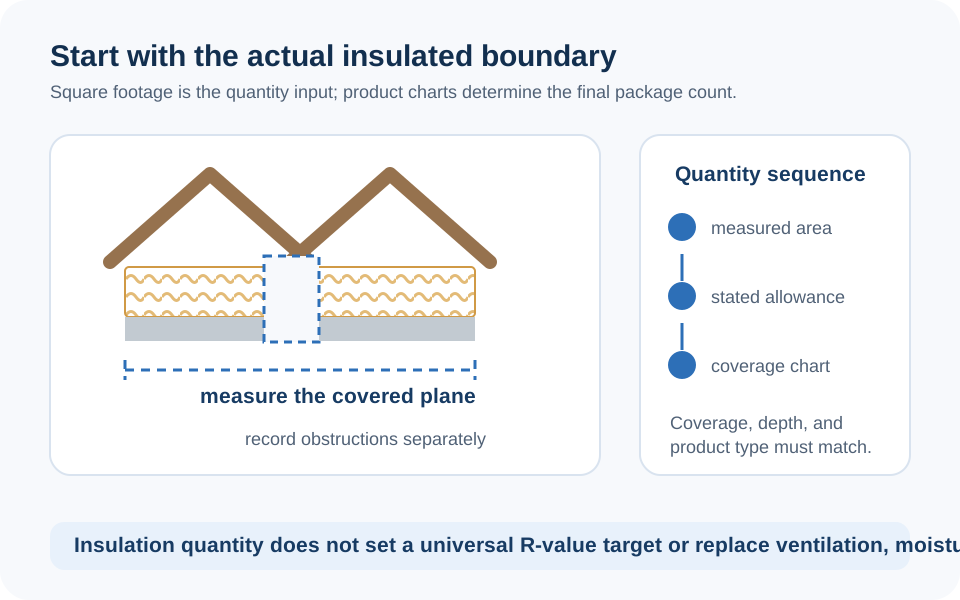
  1. Attic or floor mode: measure the length and width of the actual area receiving the selected insulation layer. Separate wings, knee walls, or inaccessible zones if they do not share the same product or depth.
  2. Wall mode: measure wall length and height, then subtract only the windows and doors whose dimensions you have measured and that truly remove the insulation area being ordered.
  3. Keep obstructions visible. Framing, wiring, plumbing, ducts, hatches, chimneys, recessed fixtures, and other details may change the product, installation method, or project requirements even when they do not make a simple rectangular area disappear.
  4. Use a stated allowance. Keep cuts, transitions, and product-specific handling separate from the net measured area.
Diagram comparing an attic floor area and a wall area, with wall window and door openings separately measured before calculating net insulation area.
Measure the actual insulation boundary. Gross area, real openings, and the allowance should remain separate values.

Use the Square Footage Calculator for an independent measurement check when that helps. It still does not choose the insulation system.

The quantity formulas used by the tool

For every mode, the calculator starts with gross area:

Gross and net area
gross area = dimension A × dimension B × identical sections; net area = max(gross area − entered openings, 0)

It then applies the allowance you choose and turns that area into a purchase quantity:

Batts, rolls, or bags
units to order = ceil(net area × (1 + entered allowance) ÷ entered coverage per unit)

For spray foam, the calculation instead uses board feet:

Spray-foam quantity arithmetic
board feet = ceil(net area × (1 + entered allowance) × entered depth in inches)

The displayed depth is a separate planning calculation:

Planning depth shown by the calculator
displayed depth = entered target R-value ÷ calculator material-mode R per inch

This depth result is not a product specification. The U.S. Department of Energy notes that R-value depends on material type and thickness, while the actual assembly and local requirements determine what is appropriate for a particular building.

For loose-fill insulation, the product coverage chart controls the bag count

Loose-fill coverage changes with the product, the target R-value, density, installation equipment, and settled thickness. That is why a bag count cannot be accurately derived from a generic “bags per 1,000 square feet” rule. The calculator counts bags by dividing the area with allowance by the coverage per unit field.

Enter the coverage printed for the exact product at the exact target R-value or settled depth. For example, Owens Corning's AttiCat product page publishes different maximum net coverages per bag at different R-values. That is a product-specific illustration, not an endorsement or a coverage number to copy into every estimate.

One important calculator behavior: in bag mode, changing the depth field does not automatically recalculate the coverage-per-bag input. Treat the label coverage field as the controlling quantity input. If the target R-value or depth changes, look up the new exact label coverage and update it before relying on the bag result.

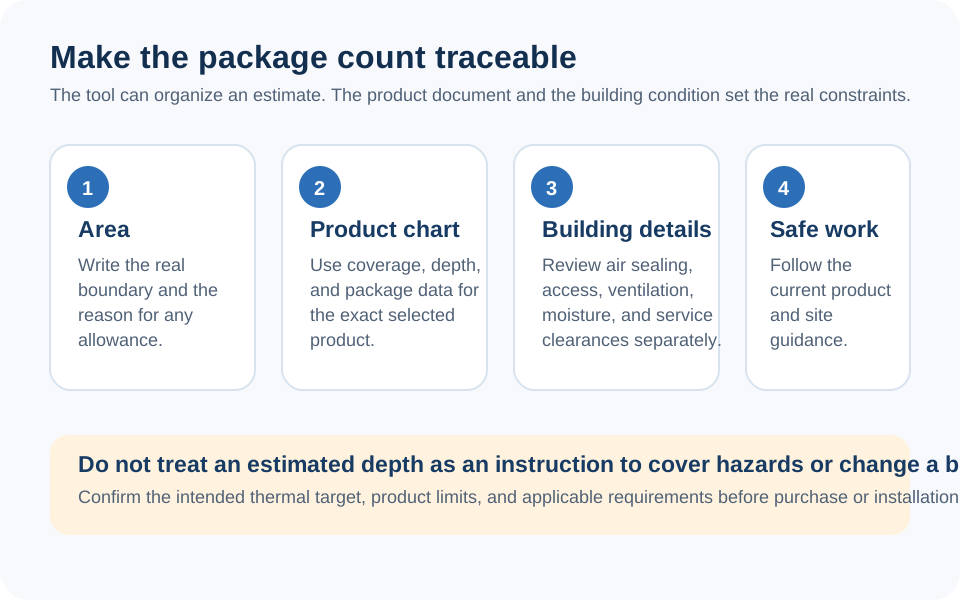
Insulation order-check diagram separating net area, product label coverage, target R-value, thickness or settled depth, air-sealing details, and the final material order.
Area arithmetic does not choose the full thermal, air, moisture, or fire-safety assembly. Verify those project requirements separately.

R-value targets are not a universal recommendation

R-value measures resistance to heat flow, but a target number by itself does not describe a complete building enclosure. Climate zone, location, assembly type, cavity depth, continuous insulation, air sealing, moisture conditions, existing insulation, and local requirements all matter. The calculator's mode presets are useful starting values for comparison, not proof of compliance.

The Department of Energy home-insulation guide shows climate-zone and application-dependent guidance. The ENERGY STAR attic guidance also emphasizes checking existing insulation depth and the resulting R-value. Use those sources to ask better questions; use the applicable local requirements and responsible project advice to choose the assembly.

What this calculator deliberately does not decide

Area and package arithmetic cannot decide how an insulation system should be installed. This tool does not diagnose existing insulation, select a climate-zone target, determine continuous-insulation requirements, choose vapor or air-control layers, evaluate moisture or combustion-safety risks, set clearances, choose spray-foam type, authorize work around electrical or mechanical equipment, or establish fire and code compliance.

Do not use the displayed depth or unit count as permission to compress, overfill, omit, or alter a product system. Use the result as a transparent starting quantity, then confirm the complete assembly with the product documentation and responsible project parties. If the result or formula is unclear, use the page's Report an issue option so it can be reviewed.

Final checks before buying insulation

  1. Confirm the actual insulated boundary and remeasure every separate area.
  2. For walls, verify that each opening deduction belongs to the insulation layer being ordered.
  3. Record the exact product name, R-value, package coverage, thickness or settled depth, and installation document.
  4. Keep net area, allowance, package count, and cost quote as separate values.
  5. Verify the full assembly, local requirements, air sealing, moisture, clearance, and safety considerations before installation.

That record gives you something better than a generic number: it explains why the order exists and makes it easy to update when the product, target, or measured area changes.

FAQ

Frequently Asked Questions

How does this calculator estimate how much insulation I need?
It calculates gross area, subtracts entered wall openings where wall mode is active, adds the allowance you enter, and divides by the coverage-per-unit input. The coverage input should match the exact product label.
Does the calculator choose the correct R-value for my house?
No. Its mode targets are planning defaults only. The appropriate target depends on climate, location, existing conditions, assembly type, local requirements, and the responsible project parties.
Should I subtract windows and doors from a wall insulation estimate?
Subtract only measured openings that truly remove the area receiving the selected insulation. Keep different wall sections, headers, transitions, and assemblies visible rather than forcing them into one average calculation.
Why does the calculator show a required insulation depth?
It divides the entered target R-value by the calculator's material-mode planning R-per-inch value. It is a comparison figure, not a product thickness recommendation or complete assembly specification.
Why does changing the loose-fill depth not change the bag count?
In bag mode, the calculator uses the coverage-per-bag input to calculate quantity. It does not automatically update coverage when depth changes, so enter the exact product-label coverage for the selected R-value or settled depth.
Can I use this calculator to price insulation work?
It can multiply the unit and delivery costs you enter, but it does not supply a market price or a complete quote. Verify product, delivery, preparation, access, installation, and project scope with current local information.
Does more insulation automatically solve air leaks or moisture issues?
No. Insulation quantity is only one part of a building enclosure. Air sealing, moisture control, ventilation, clearances, combustion safety, existing conditions, and the selected assembly require separate project-specific review.

Related Calculators

Explore all Construction calculators →