
How to Estimate Concrete Blocks and Mortar: Courses, Openings, and Unit Types
Estimate a concrete masonry wall by drawing courses and openings, identifying the unit types the detail requires, and treating mortar as a product-specific volume estimate rather than a fixed bag rule.
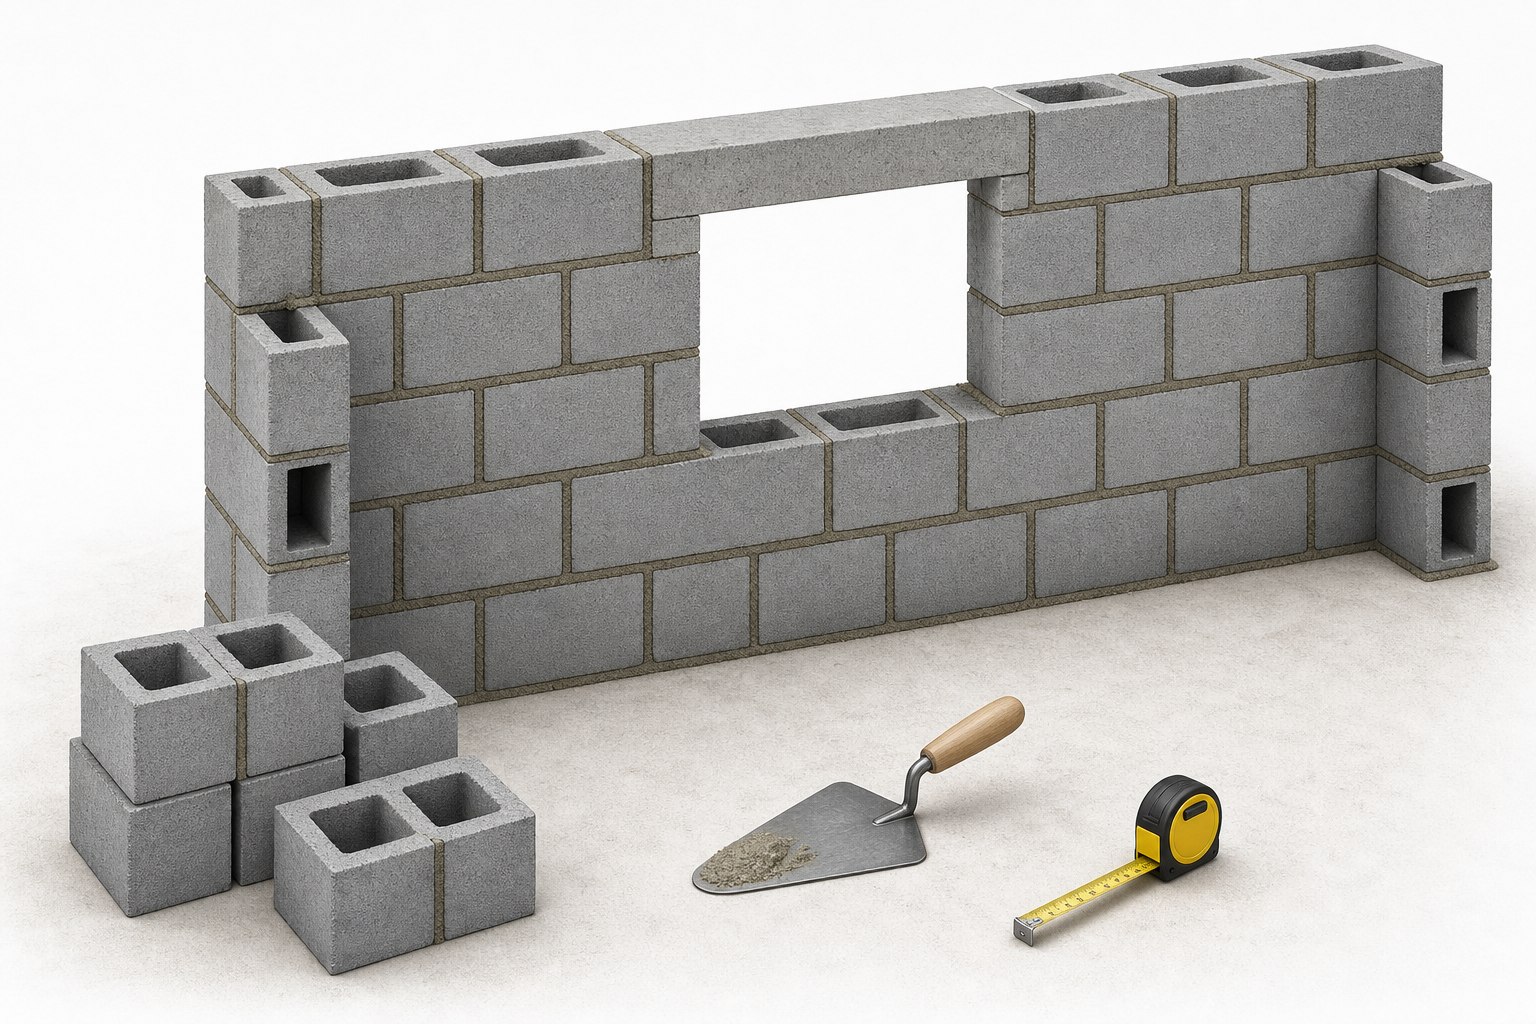
Concrete block estimating is most reliable when it follows the wall drawing course by course. Start with the wall length and height, then show the corners, returns, openings, control or expansion details where specified, reinforcing-related units, bond-beam or lintel locations, and caps. Our Concrete Block Calculator can organize a preliminary unit count, but it does not design a wall or determine footing, reinforcement, grout, mortar, drainage, fire, wind, seismic, or permit requirements.
Do not order masonry from a block count alone. Load-bearing walls, retaining walls, foundations, reinforced masonry, lintels, bond beams, grout, anchors, and waterproofing need approved project details and applicable code. A supplier can help identify unit availability, but cannot substitute for the required design information.
Start with an elevation, not a wall-area shortcut
Draw each wall face in elevation. Mark finished length and height, grade changes, corners, wall returns, doors, windows, vents, pilasters, columns, cap units, and all locations called out on the plans. Next, draw horizontal course lines using the nominal height of the selected unit-and-joint assembly. Concrete masonry units are commonly described by nominal dimensions that include an intended mortar-joint module, while the actual unit dimensions can be smaller. Confirm the exact unit from the local supplier before finalizing the takeoff.
If the result is not a whole number, do not silently round it. The drawing may call for a different unit, a cut course, a cap, a grade change, or a revised wall height. That remainder is useful information: it identifies an item that must be resolved before ordering.
Do the same across the wall length. Divide the finished run by the nominal face length of the selected unit-and-joint module. Mark whether the wall begins or ends with a half unit, corner unit, return, or other special piece. A clean numerical answer can still be wrong if the visible bond pattern does not land correctly at a corner or opening.
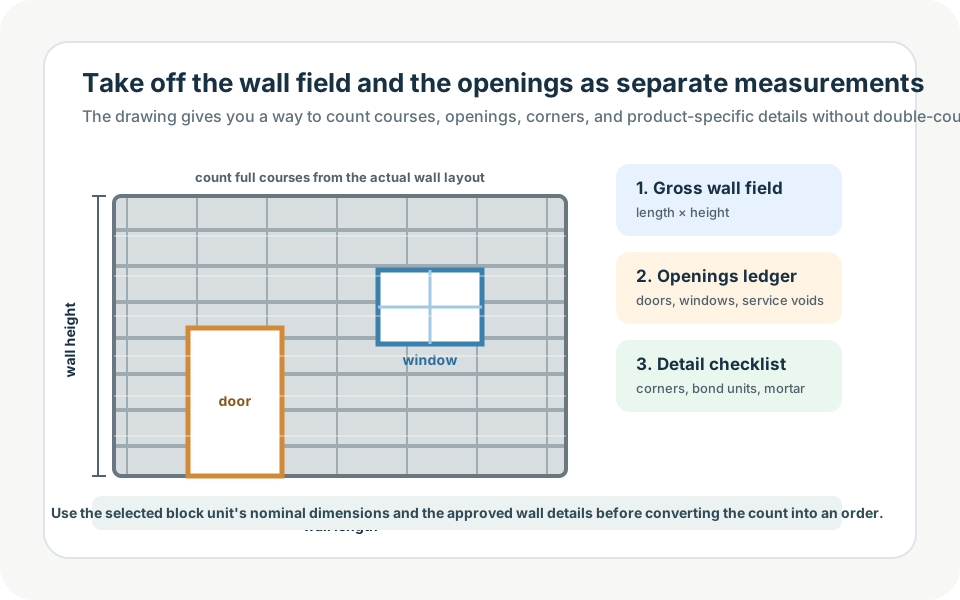
Count field units by course and by type
Once the elevation is drawn, create a course schedule. For a simple straight wall, a first-pass field quantity can be calculated from the number of full units in each course multiplied by the number of courses. Then replace the generic count with the actual types shown in the drawing: standard stretcher units, half units, corner units, jamb units, sash units, knockout or open-end units, lintel units, bond-beam units, cap units, or another manufacturer-specific product.
| Line item | How to count it | Why it cannot be hidden in a total |
|---|---|---|
| Standard field block | Full repeating units by course | It is the base wall quantity |
| Half and cut units | Ends, bond pattern, and openings | They affect waste and supplier availability |
| Corner and return units | Each wall change in direction | Corner geometry changes exposed faces |
| Lintel or bond-beam units | Only where plans specify them | They relate to structural/reinforcing details |
| Cap or specialty units | Top course and architectural details | They may have different dimensions and lead time |
A useful check is to trace each course left to right. Write a row such as: corner unit, six field units, one opening jamb unit, opening, jamb unit, six field units, corner unit. That takes more time than multiplying wall area by a published units-per-area figure, but it exposes changes in unit type and makes the supplier order understandable.
Handle openings by drawing their courses
An opening is not merely negative wall area. A door or window changes the courses around it. It may require jamb units, a sill, a lintel, reinforcement, grout, flashing, a bond-beam course, or cut units. Those requirements come from the wall design and selected system, not from this guide. For quantity purposes, draw the opening on the elevation and count what appears on each affected course.
For example, a nominal 3 ft by 7 ft door opening can remove many field units, but it may also create partial cuts beside the jamb, a lintel or reinforced detail above, and different units at the sides. Subtracting its 21 sq ft from wall area gives a rough field-block reduction only; it does not create a complete material list. Record the field units removed and the special units added as different rows.
Be cautious with small penetrations. They can require cuts, sleeves, seals, and coordination even when their area is too small to reduce the order by a whole block. Do not subtract them from the block count unless the planned layout shows a real omitted unit.
Mortar is a joint-volume and product decision
Mortar quantity depends on the actual unit dimensions, bed and head-joint geometry, wall thickness, workmanship, absorption, batch handling, waste, and the selected mortar product. A generic bag rule is not dependable across different block sizes or wall configurations. Use the current coverage data from the selected preblended mortar manufacturer, or calculate from the specified mix and project method where appropriate.
Before estimating mortar, write down the selected unit type, wall thickness, nominal joint treatment, mortar type or product, package size, current manufacturer coverage, and the number of joints affected by openings and special units. Then keep a separate stated contingency for handling loss, weather interruptions, test panels, and changes. The contingency should be visible; it should not be disguised as a false precision in the field-block count.
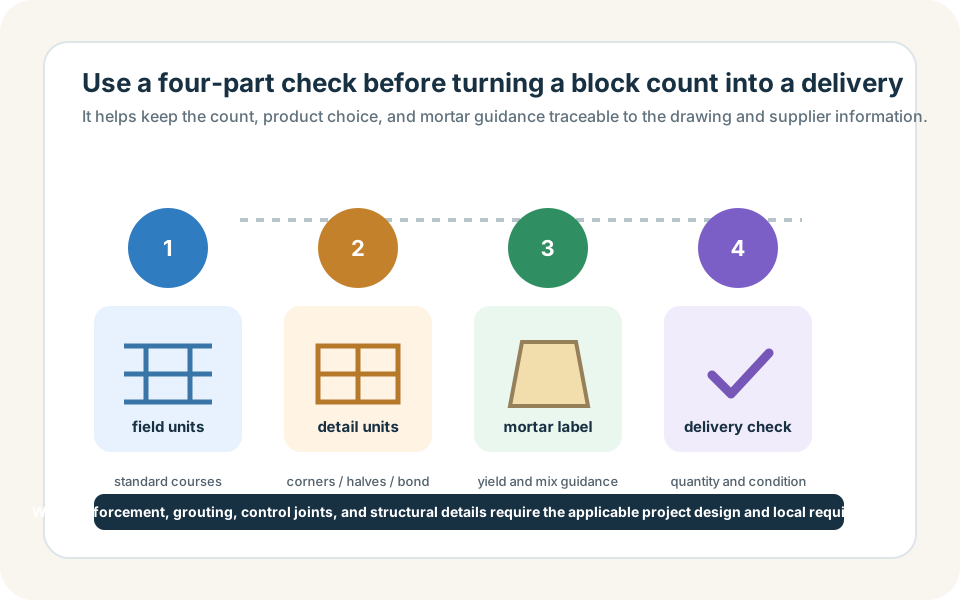
Do not merge block, grout, and reinforcement quantities
Some walls use reinforcing steel, grouted cells, bond beams, or special units that make a field block visually similar while changing the material and installation requirements substantially. A block takeoff can identify how many special units appear in a drawing, but it cannot determine which cells are grouted or the amount and placement of reinforcing. Use the approved structural or masonry documents for that schedule. If the project includes a footing or concrete fill, calculate it from its own dimensions with the Concrete Calculator, not by inferring it from the wall area.
For a retaining, foundation, or load-bearing wall, do not treat a homeowner-scale layout as permission to build. Soil, drainage, lateral loads, bearing, wind, seismic conditions, water management, and local requirements can change the entire wall system. The material order should wait for the relevant design decisions.
Build a final supplier-ready schedule
A supplier-ready schedule has a separate row for each unit type and accessory. Include the manufacturer or local product line, nominal and actual dimensions, color or finish where relevant, quantity, expected packaging, and lead time. Include mortar separately by product and package. Add a notes field for unresolved items such as a cap detail, matching corner unit, lintel designation, or delivery access.
Then perform three checks. First, count total course modules and compare the wall height with the elevation. Second, trace the bond at every corner and opening to make sure units land as drawn. Third, compare the special-unit schedule with the approved details. If a unit is not locally available in the proposed size or finish, revise the layout before ordering instead of replacing it with an arbitrary standard block.
What a concrete-block calculator cannot verify
A calculator can reduce arithmetic errors and show a preliminary quantity. It cannot verify structural capacity, local code, reinforcement, grout placement, footing design, mortar selection, weather protection, moisture management, compatibility of finishes, or whether a wall is safe to build. Treat a preliminary calculation as an estimating worksheet. The final order should be based on current product information and approved project documents.
The best outcome is a takeoff someone else can audit: drawing revision, finished dimensions, unit dimensions, course count, field units, special units, openings, mortar product and coverage source, allowance reason, and open design questions. That is genuinely more useful than a single block total because it makes every assumption visible.
Sources and assumptions
These links support the specific material, product, or reference points used in this guide. Local conditions and supplier specifications can still vary.
- Concrete Masonry & Hardscapes Association: CMU-TEC-001 Industry technical reference for concrete masonry units. Confirm the unit dimensions, reinforcing, grout, mortar, and wall requirements in the approved project documents and local code.
- Concrete Masonry & Hardscapes Association resources Use current technical documents and manufacturer data for the selected unit and wall system.