
Siding Takeoff: Wall Elevations, Openings, Panels, Trim & Order Checks
Build a traceable siding worksheet from individual wall elevations, opening schedules, product coverage, cut-pattern allowance, and separate trim and wall-system checks.

A useful siding estimate is not one number labeled house area.
It is a small set of records that answer different questions: an elevation ledger for the geometry, an opening schedule for doors and windows, a product ledger for installed coverage and package size, and an order check for trim, wall-system details, and supplier choices. Keeping those records separate is the original value of this guide. It lets you change one wall, one product, or one opening without rebuilding the entire estimate from memory.
Use the Siding Calculator after the measured ledger is ready. It can repeat transparent wall-area, opening, allowance, and purchase-unit arithmetic. It cannot choose cladding, inspect existing walls, determine flashing or water-resistive-barrier details, specify fasteners, establish wind design, or approve construction.
A siding takeoff is a quantity worksheet, not an exterior-wall design. Before ordering or removing material, confirm the complete selected product system, existing wall condition, project documents, local requirements, and manufacturer instructions with the responsible project parties.
Start with an elevation ledger, not the building perimeter
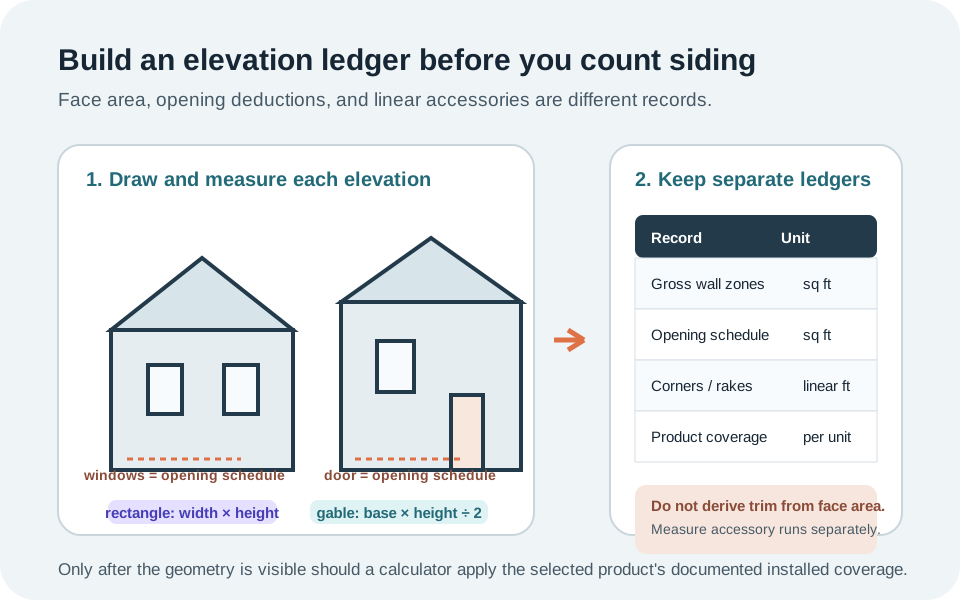
A perimeter multiplied by one height can be a quick screen, but it is not a reliable order record when walls have gables, stepped roof lines, porches, bump-outs, returns, different cladding zones, or grade changes. Draw each visible elevation and split every shape into simple zones that can be checked later.
| Ledger line | Measure and record | Why it stays separate |
|---|---|---|
| Rectangular wall zone | Finished cladding width and height | It provides a transparent gross-area base: width times height. |
| Gable or other triangle | Base and perpendicular height | It uses its own geometry: one-half times base times height. |
| Step, bump-out, return, or material change | Its own dimensions and product note | It can change both face area and cut pattern. |
| Window or door | Actual width, height, location, and trim/flash note | Removed face area is not the same as a complete opening-detail or trim count. |
| Corner, rake, or edge run | Linear feet and the applicable product-system note | Linear accessories cannot be inferred safely from square feet alone. |
For a single rectangle, the Square Footage Calculator can check the area arithmetic. Keep its answer in the elevation ledger rather than combining it immediately with product coverage or a blanket waste percentage.
Measure gross areas first, then record exceptions
Calculate each simple surface before subtracting anything. This makes a missing gable, porch wall, or material change visible. The basic area formulas are:
Triangle area = base × perpendicular height ÷ 2
Gross cladding area = sum of all named elevation zones
Next, list each opening separately. For every window or door, record the actual width and height, the elevation, and whether the edge will use a particular trim, flashing, reveal, or product-specific detail. A common mistake is to subtract a group of windows from square footage and then forget that the surrounding cuts, trim, and wall-system work still need a separate check.
Do not force unlike openings into one average-size entry just because a calculator accepts an average. If two windows differ enough to change the cut pattern, material type, or accessory record, keep them on separate rows and total them afterward.
Turn net face area into a product quantity
After the elevation and opening schedules are complete, calculate the net cladding face area for the selected product zone:
Then copy the installed coverage per purchased unit from the exact product's current package, data sheet, or supplier record. Do not substitute nominal board size, box size, or a generic square-foot figure when installed exposure, overlap, panel geometry, or package contents are different. The Vinyl Siding Institute's installation manual and James Hardie's product documentation route both reinforce the practical boundary: product-specific documentation and applicable local requirements control the work.
Order units = round up after the stated allowance is applied
Some products are sold by panel, carton, bundle, linear foot, or a supplier-defined coverage unit. The unit does not matter to the formula; the documented installed coverage does. Keep the coverage source and the package unit on the same ledger row so someone can audit the calculation later.
Make a cut-pattern allowance explainable
There is no trustworthy universal siding-waste percentage. A long, uninterrupted elevation may create few offcuts; gables, short returns, narrow strips beside openings, panelized systems, color matching, or a strict layout can change the result. Start with the base quantity, sketch the expected layout, then record the reason for any added material.
| Reason for extra material | Record it as | Do not use it to hide |
|---|---|---|
| Known offcuts from gables, returns, or short panel runs | A documented layout allowance | An unmeasured elevation. |
| Non-reusable cut pieces or a product-specific layout rule | A product and cut-pattern note | Unknown product coverage or installed exposure. |
| Whole-package round-up | A package decision after the raw result | Wall repair, flashing, or trim scope. |
| Approved repair stock or a required color-batch decision | A separately stated purchaser decision | A claim that the calculator selected the final order. |
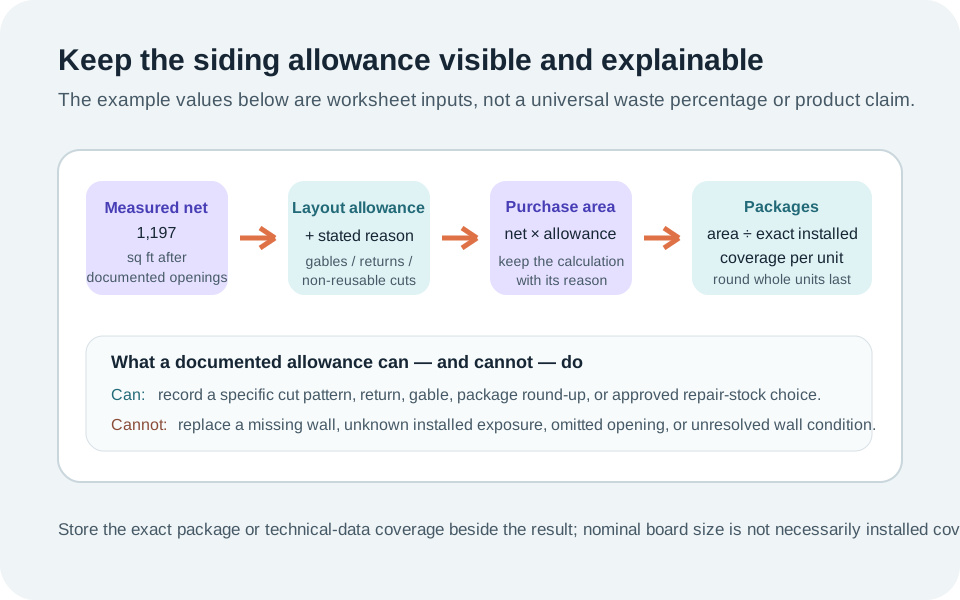
This distinction matters. Changing the product, elevation geometry, or opening layout requires a new base takeoff; it is not a reason to increase a percentage until the total feels safe.
Worked example: four elevations and a product ledger
Suppose a house has two 36 ft by 9 ft rectangular elevations, two 30 ft by 9 ft rectangular elevations, and two triangular gables with a 36 ft base and a 6 ft perpendicular height. The elevation ledger gives:
- Rectangular walls: (2 × 36 × 9) + (2 × 30 × 9) = 1,188 sq ft.
- Gables: 2 × (36 × 6 ÷ 2) = 216 sq ft.
- Gross measured cladding area: 1,188 + 216 = 1,404 sq ft.
- Openings: twelve 3 ft by 4 ft windows total 144 sq ft, and three 3 ft by 7 ft doors total 63 sq ft. The documented opening total is 207 sq ft.
- Net cladding face area: 1,404 − 207 = 1,197 sq ft, or 11.97 squares when a square is used only as a 100-sq-ft area convention.
Now suppose the exact selected product record states 48.0 sq ft of installed coverage per carton, and the layout review supports a stated 7% cut-pattern allowance for gables and edge pieces. These are hypothetical worksheet inputs, not a product recommendation.
Raw cartons = 1,280.79 ÷ 48.0 = 26.68
Order cartons = round up to 27 cartons
The result is transparent because the calculation retains four independent facts: net face area, source of coverage, reason for the allowance, and whole-carton round-up. A different siding profile, package, installed exposure, or panel layout should change the applicable ledger line rather than silently altering the total.
Keep panels, trim, and wall-system decisions on different lines
Net siding area is a face-area calculation. It does not tell you how many starter strips, corners, J-channel, trim boards, flashing pieces, tape rolls, fasteners, or weather-resistive-barrier materials belong on the project. Those components use linear runs, opening geometry, product compatibility, stock lengths, and the selected wall detail.
For the example above, the ledger might separately show four 9 ft outside-corner runs, window perimeters, door edge runs, and gable rakes. It should not turn those measurements into a generic trim order until the exact siding system says which accessories apply, which stock lengths are available, and how openings are detailed. The Siding Calculator's accessory lines are useful preliminary prompts; confirm every component against the product documentation before purchase.
Likewise, a house-wrap roll estimate is only an area prompt. A water-resistive barrier, flashing, drainage detail, and opening transition belong to the full wall system. DuPont's recessed-window guidance is one product-system example, not a universal instruction. Do not use coverage math to decide whether a wall is sound, dry, code-compliant, or ready for cladding.
Common takeoff mistakes to catch before ordering
- Using one wall height for everything. Split gables, steps, lower-wall changes, and returns into their actual shapes.
- Subtracting openings without scheduling them. Record each opening's size, location, and applicable trim or wall-detail note before subtracting its area.
- Calculating from nominal product size. Use the exact product's documented installed coverage, not a nominal board or panel dimension.
- Calling every extra piece waste. Separate planned cut allowance, whole-package round-up, repair stock, and unknown scope.
- Turning square footage into a trim order. Measure accessory runs separately and verify components, stock lengths, and details for the selected product.
- Using a siding estimate as a wall inspection. Existing moisture, rot, pests, structural issues, lead-painted surfaces, flashing, and code questions need their own responsible review.
Final order reconciliation
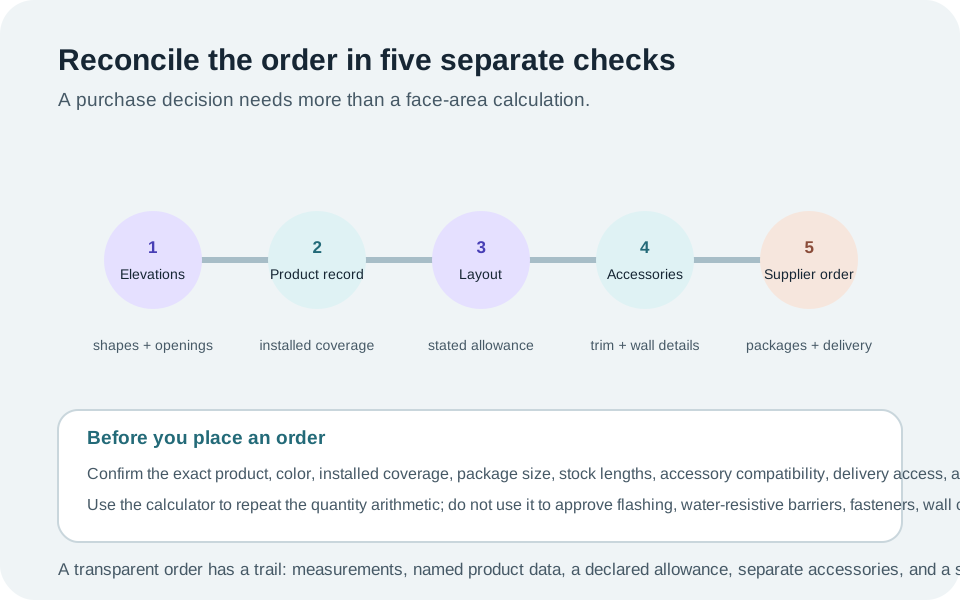
Before placing an order, use this final pass to compare the worksheet with the actual project:
- Recheck every elevation's measured dimensions, shape, material zone, and opening total.
- Confirm the exact cladding product, finish, color, installed coverage, packaging, and current product documentation.
- Keep the layout-based allowance and whole-package round-up separate from the base quantity.
- Compare the separate corner, opening, rake, starter, trim, flashing, water-resistive-barrier, fastener, and repair lines with the actual wall-system documents.
- Record supplier availability, stock lengths, delivery access, quote date, tax treatment, and any unresolved site issue outside the calculator.
For related exterior quantities, use the Gutter Calculator or Roofing Calculator as separate planning tools. They do not design the roof-to-wall or opening details that connect those systems. If a pre-1978 U.S. property may involve work that disturbs painted surfaces, the EPA RRP information for contractors describes a separate compliance area; this guide cannot determine whether it applies.
Use the calculator as a repeatable order-check, not the final decision
The Siding Calculator is most useful when it repeats an honest ledger: named elevations, recorded openings, a source-backed coverage value, and a declared allowance. It can make that arithmetic easy to revisit when a panel size or wall changes. Keep the project drawings and product documents with the result, and use the final order only after the responsible project parties have resolved the complete product and wall-system details.
Sources and assumptions
These links support the specific material, product, or reference points used in this guide. Local conditions and supplier specifications can still vary.
- Vinyl Siding Institute: Installation Manual The industry manual includes measuring and estimating context and emphasizes that local requirements and the selected manufacturer's instructions control a particular installation. It supports using a takeoff as a documented quantity record, not an installation specification.
- James Hardie: Hardie Plank Lap Siding - Installation Guidance and Technical Documents A product-specific documentation route for lap siding, installation guidance, and technical documents. It illustrates why coverage, trim, fastening, clearance, and accessory details must come from the exact selected product rather than a generic calculator default.
- DuPont: Flashing Products Installation Guidelines for Recessed Window Openings An example of manufacturer guidance for one named water-resistive barrier and flashing system at window openings. It is included to show that opening and wall-system decisions must be checked separately from siding-area arithmetic.
- U.S. EPA: Renovation, Repair and Painting Program for Contractors U.S.-specific regulatory context for paid renovation work that disturbs paint in covered pre-1978 housing or child-occupied facilities. This guide does not provide compliance or lead-safe work instructions.